■ Changing the ink cartridge of the pen
To change ink cartridges with the built-in tool on the top of the pen cap, See
Figure 5 (1-4):
Usin
g
the
No
kia
Digital Pen
w
ith a
P
C
21
Copyright
©
2003 Nokia. All rights reserved.
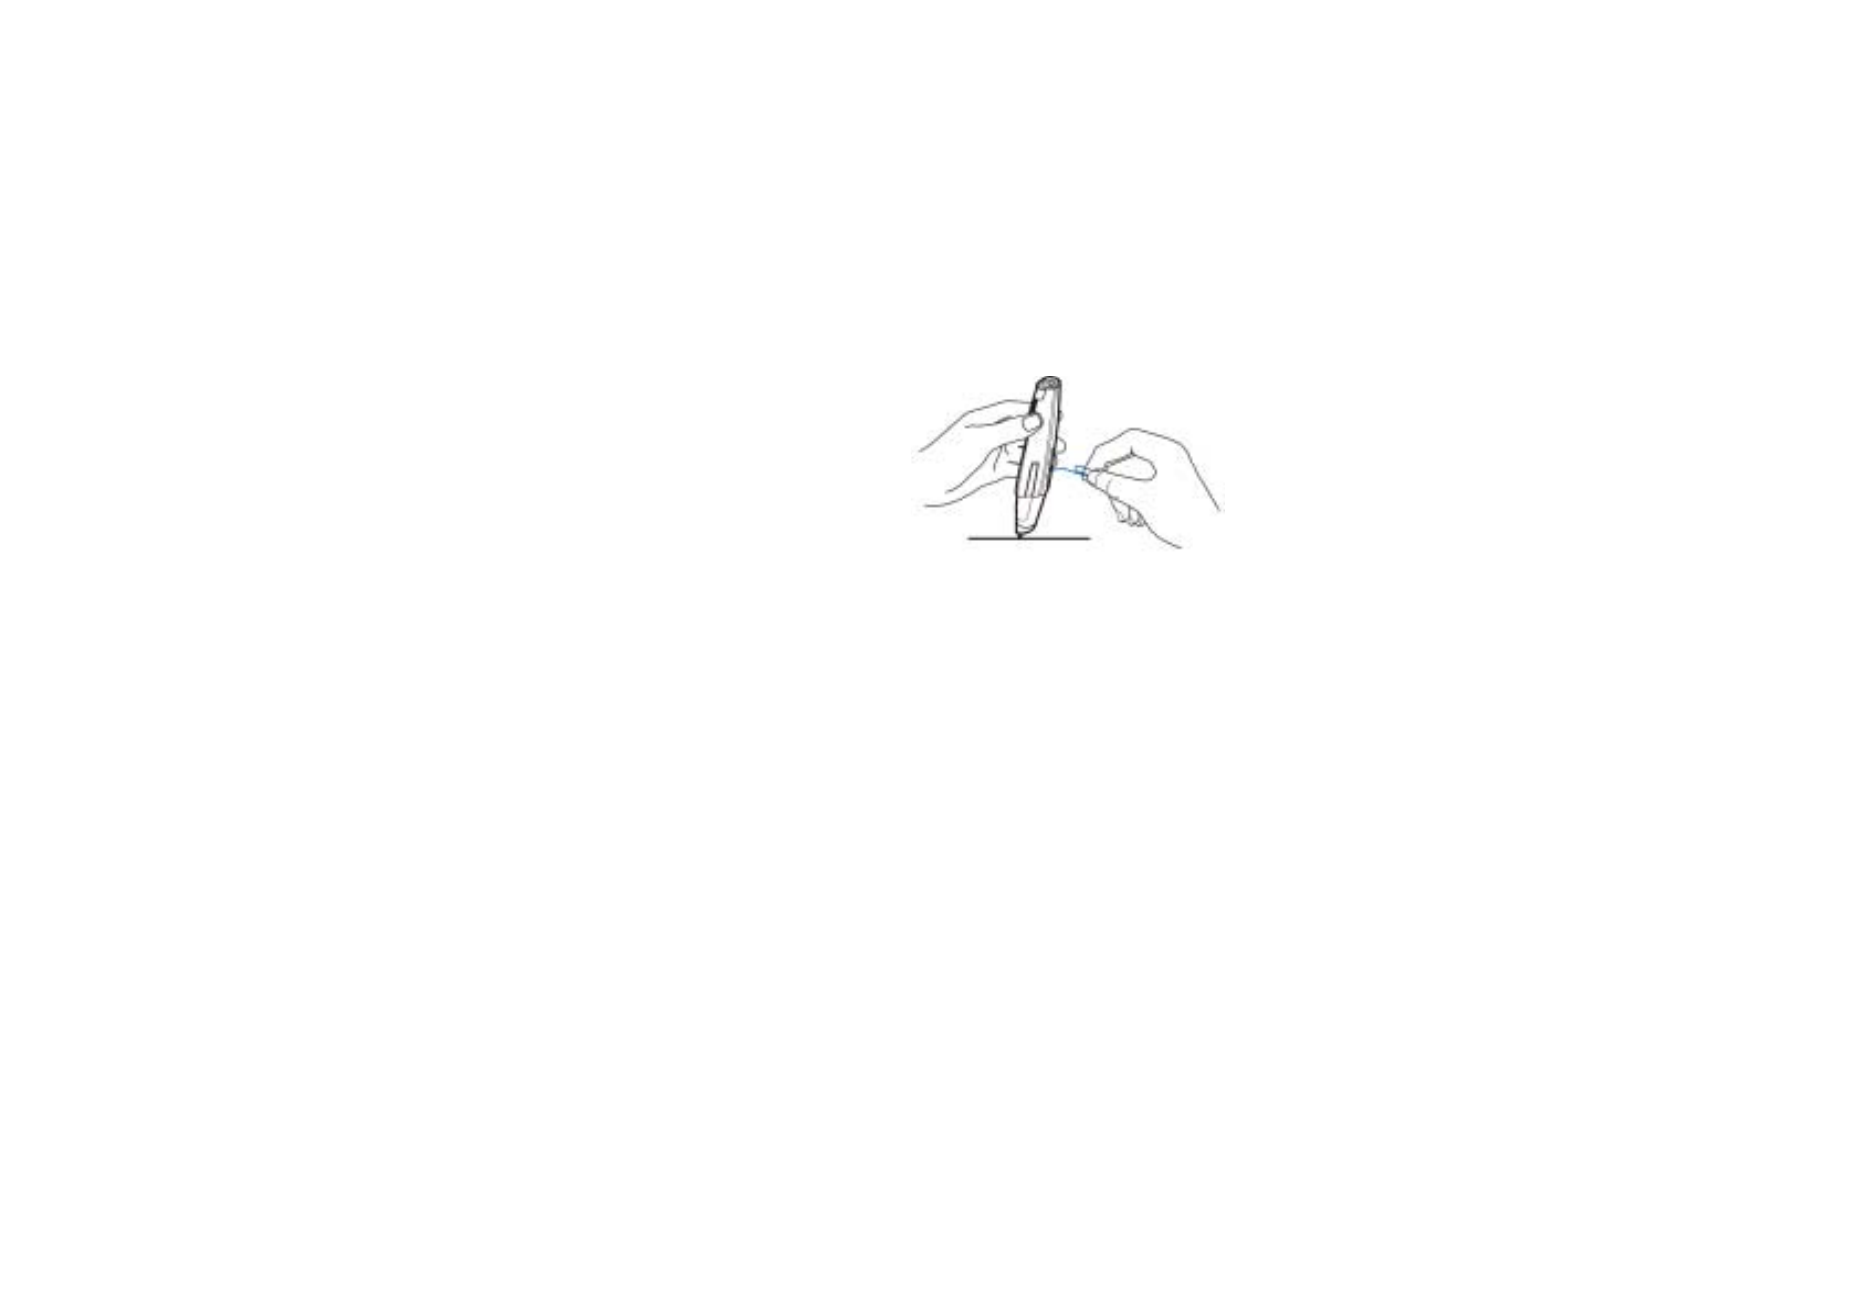
1. Place the pen tip in the hole on the cap (1 and 2).
Copyright
©
2003 Nokia. All rights reserved.
22
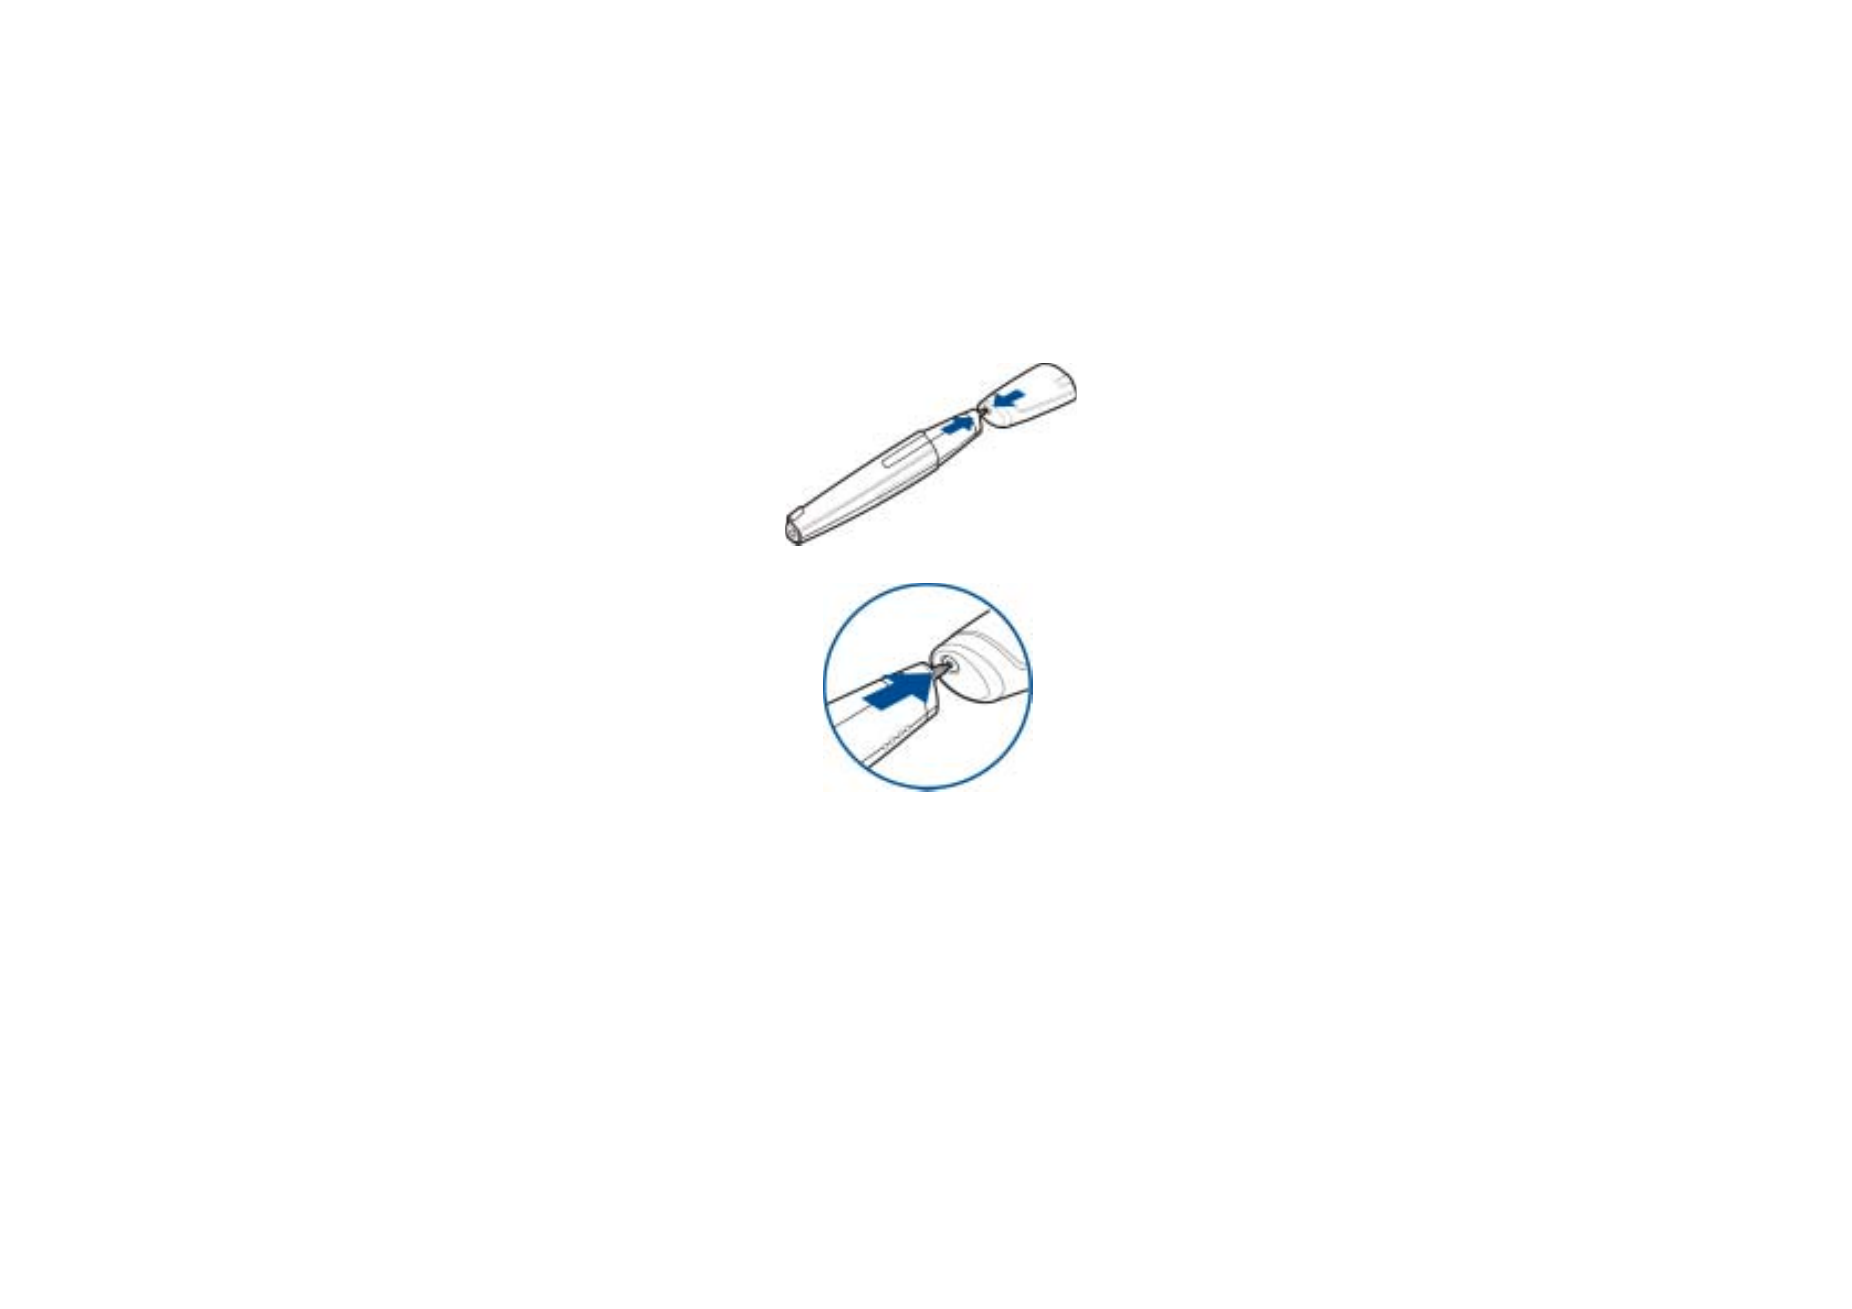
2. Tilt the cap slightly and take out the ink
cartridge by pulling the cap away. Dispose of
the ink cartridge properly (3).
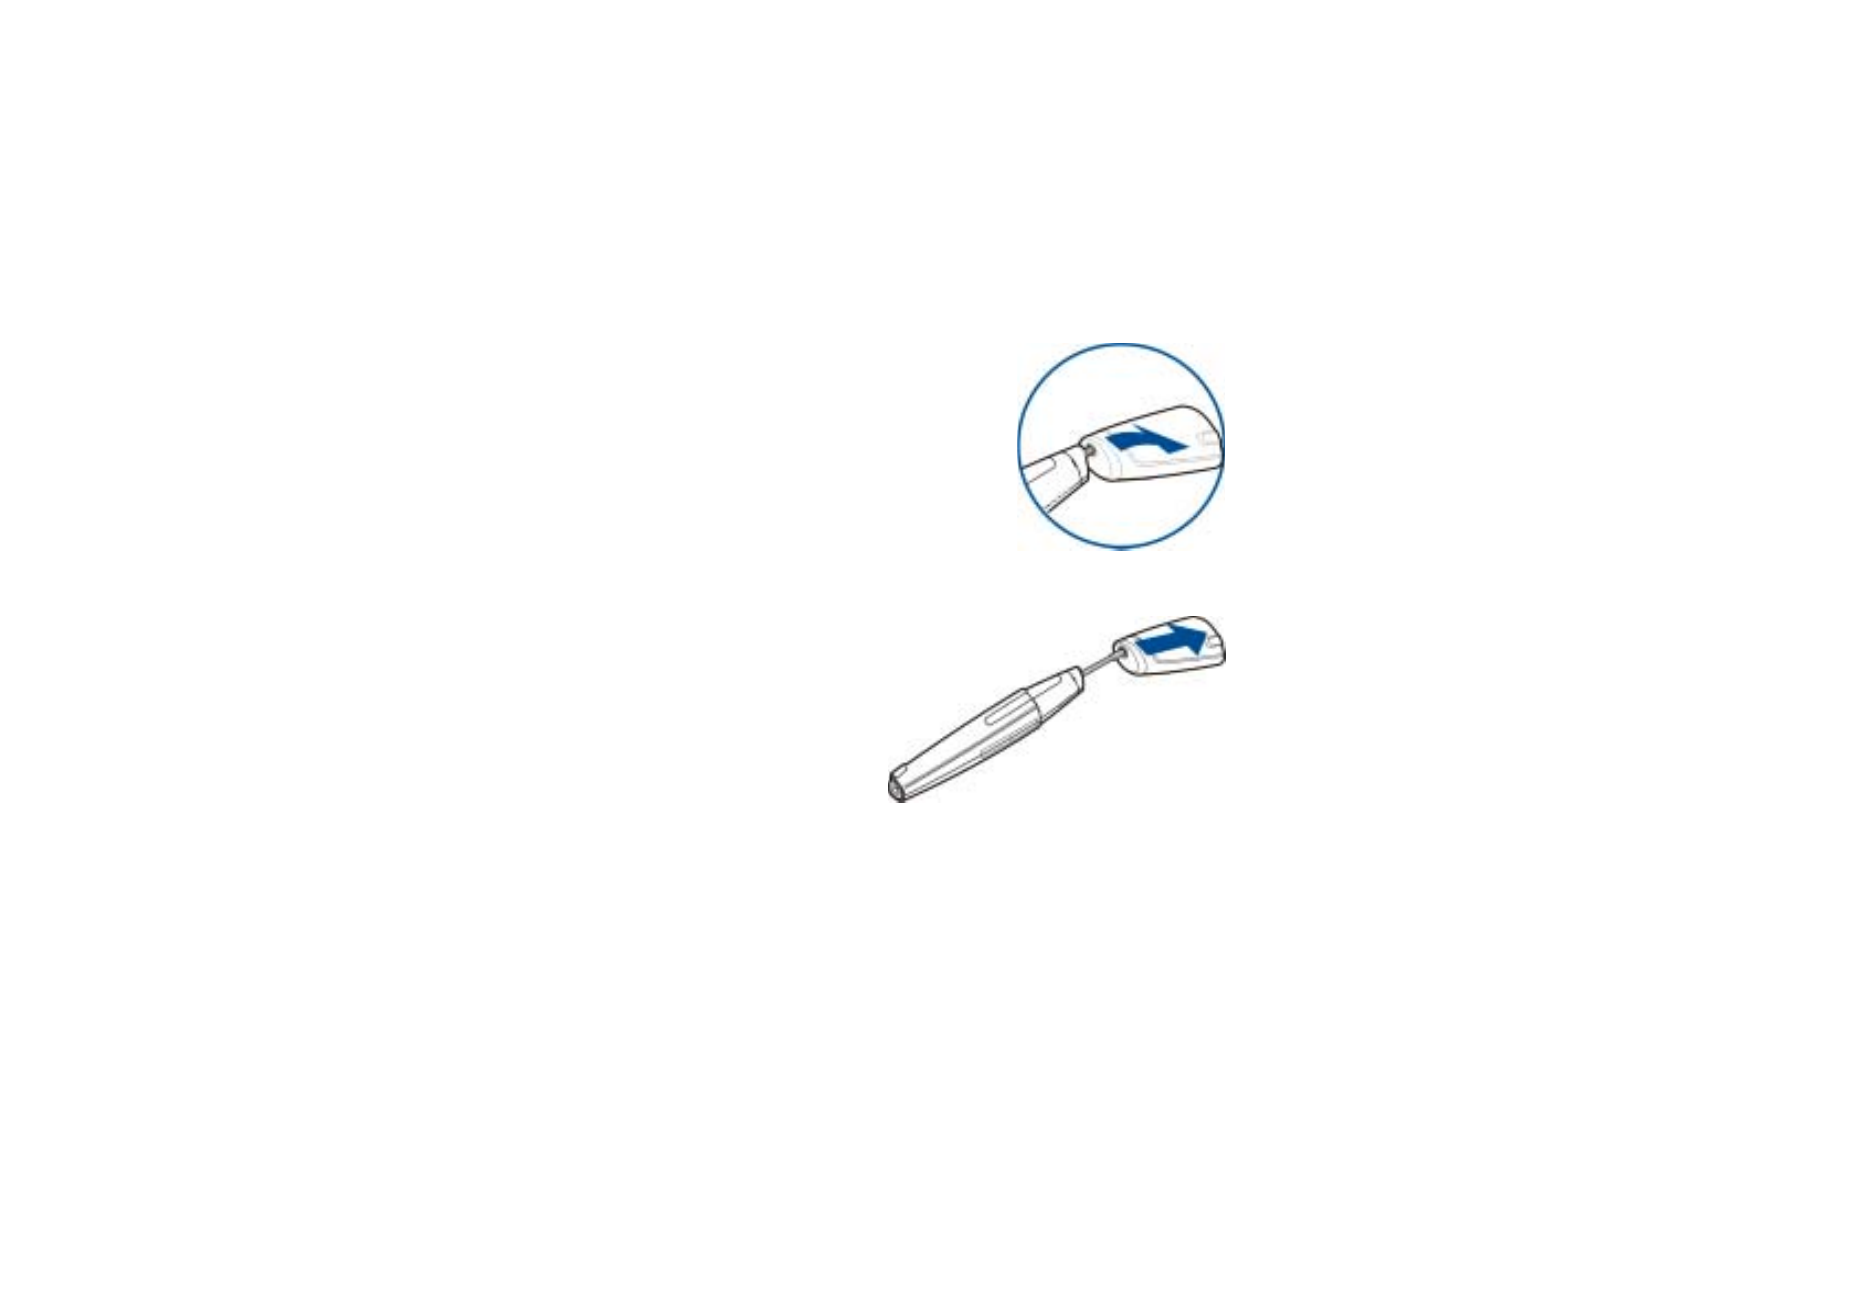
3. Gently slide a new ink
cartridge into the pen until it
cannot be pressed in any
further (4).
You can get ink cartridge
refills at local office supply
retailers. Use only ink refills
that are ISO 12757-2 DOC
compliant.
Note: Make sure that you slide the new ink cartridge in the correct hole.

Ba
ttery information
23
Copyright
©
2003 Nokia. All rights reserved.